Articles Management of Ankle Sprains
Ankle sprains are one of the most common injuries presenting to a physiotherapy clinic. We have compiled a general guide on “The Management of Ankle Sprains” to get you started.
PLEASE NOTE: It is always best to see a health professional to design rehabilitation program to suit your specific requirements.
Management of Ankle Sprains, Phase 1 (0 – 48 hrs)
Immediately following an ankle sprain our priority is to minimise the extent of damage, reduce inflammation and decrease pain.
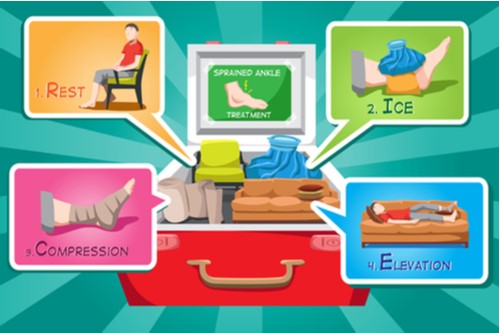
Rest, Ice, Compression, Elevation (RICE)
The signs of inflammation (redness, heat, swelling and pain) will peak in the first 24-48 hours of the injury. Inflammation is your bodies natural response to tissue damage and essential in kick starting the healing process. Unfortunately, our bodies tend to produce more inflammation than what is actually required, this can prolong the recovery process. This is when you should adopt the RICE principles:
Do I have a Fracture?
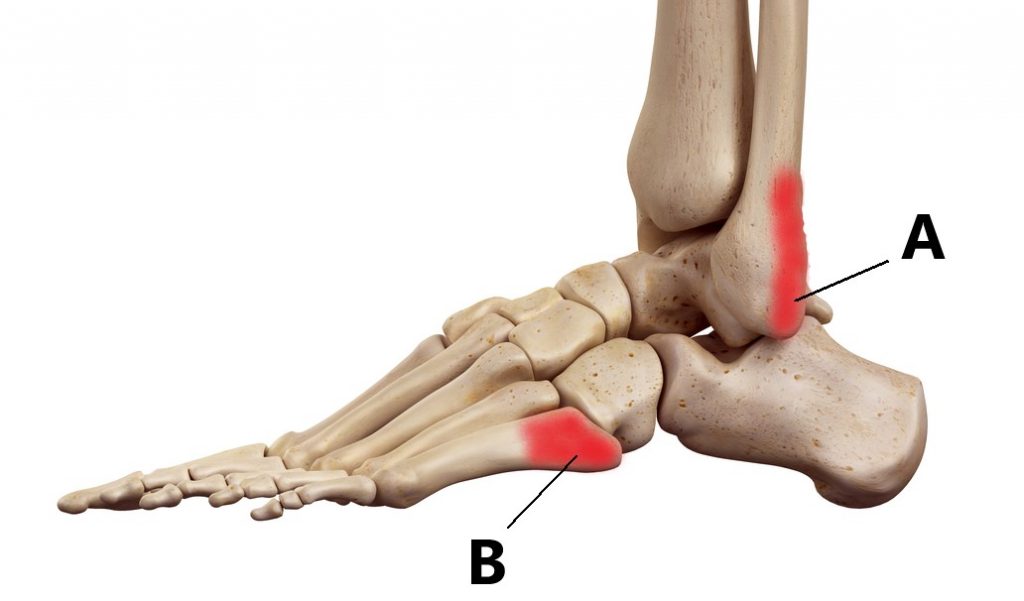
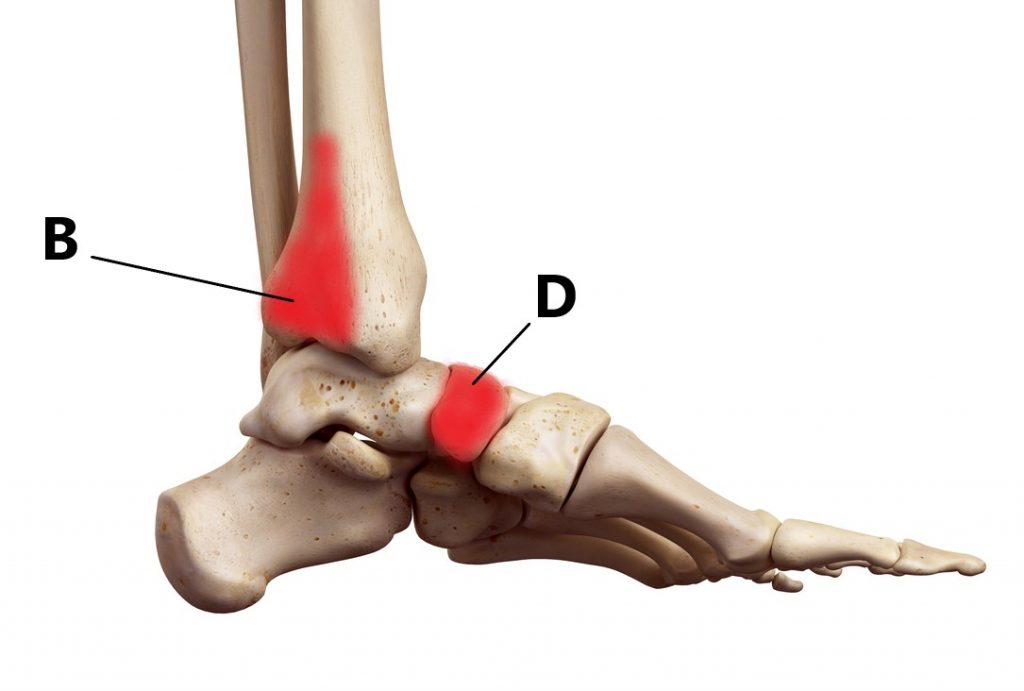
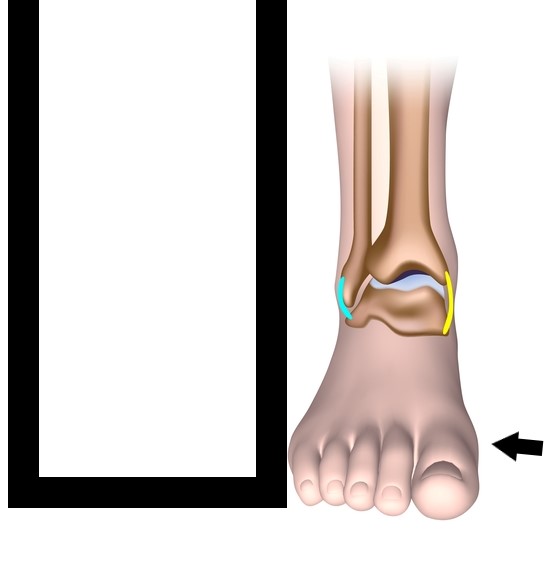
Fractures are commonly associated with ankle sprains, it is important to have these diagnosed early as it will affect how your injury will be managed. Not all ankle sprains will require an xray, as a general guide an xray will be required when:
- Bone tenderness over A or C (outside of ankle) OR
- Bone tenderness over B or D (inside of ankle) OR
- Inability to weight bear immediately following AND 1 hour after the initial injury
What Happens if I Have a Fracture?
Fractures are managed depending on their size, location, position and stability. Larger fractures, fractures involving the joint surfaces, displaced fractures and unstable fractures will require an orthopaedic opinion as surgery may be required.
Smaller, non-displaced stable fractures are typically managed by immobilising your ankle in a boot for several weeks to enable bone healing before commencing physiotherapy treatment.
Your treating doctor should provide you with specific instructions, important things to find out include:
- Am I allowed to weight bear on my foot?
- How much weight am I allowed to put through my foot?
- How long do I need to be in the boot?
- When can I commence physiotherapy treatment?

Management of Ankle Sprains, Phase 2 (Week 1 – 3)
If there are no signs of a fracture, it is best to commence early physiotherapy treatment. This helps to prevent secondary complications and speed up the recovery process. (Please Note: your ankle may swell following the below exercises you can continue to use the PRICE principles as required)
Address Unhelpful Beliefs
Following an ankle sprain many people become fearful of doing more damage and try to avoid all painful movements, this does not help the recovery process! Inflammation causes swelling and makes your ankle more sensitive, it is normal for most movements to become painful without necessarily causing damage. Replicating the original mechanism of injury (i.e. excessively twisting the ankle while weight bearing) are the only positions which will cause more damage to the sprained ligaments.
Improve Weight Bearing Ability
- if you are using crutches try not to rely too heavily on them, start putting more weight through your foot, this may be painful to start with but it will get easier over time
- strapping your ankle can provide additional support and give you more confidence

Restore Pain Free Ankle Movement


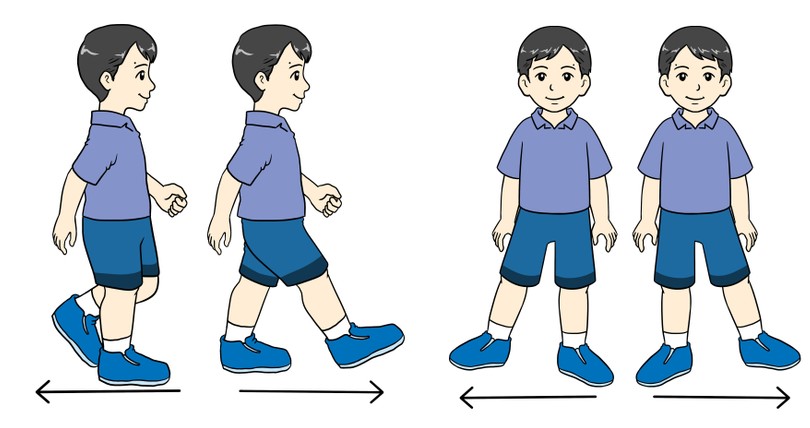
Normalise Gait Pattern
- try to bear weight evenly through your feet (as above)
- try to walk with an equal step length, you may have to make a conscious effort to take a slightly bigger step with your good leg
- do not walk on your tip toe, let your heel touch the ground
- practice in front of a mirror for visual feedback

Commence Basic Ankle Strengthening Exercises

– push your foot outwards against a solid object and hold the contraction for 10 secs
– your foot should not move
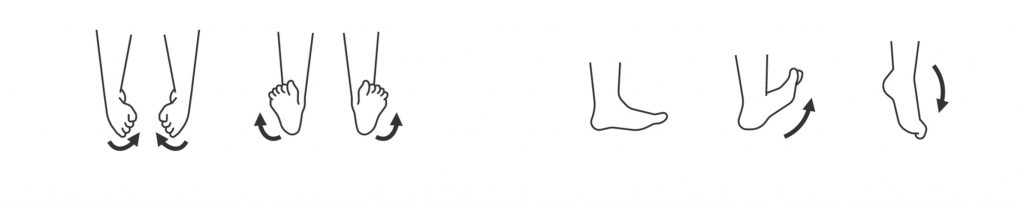
Commence Basic Balance Exercises

– Try to balance for 1 min
-Progress by standing on a cushion
– Progress by closing eyes
– Forwards/Backwards/Sideways
– Progress By Closing Eyes
– Progress By Walking on Tip Toes/Heels
Management of Ankle Sprains, Phase 3 (Week 4 – 6)
In this phase, we are trying to progress the previous exercises to regain full movement, strength and balance. If you do not regularly participate in sporting activity it is not likely you will need to go beyond this phase.
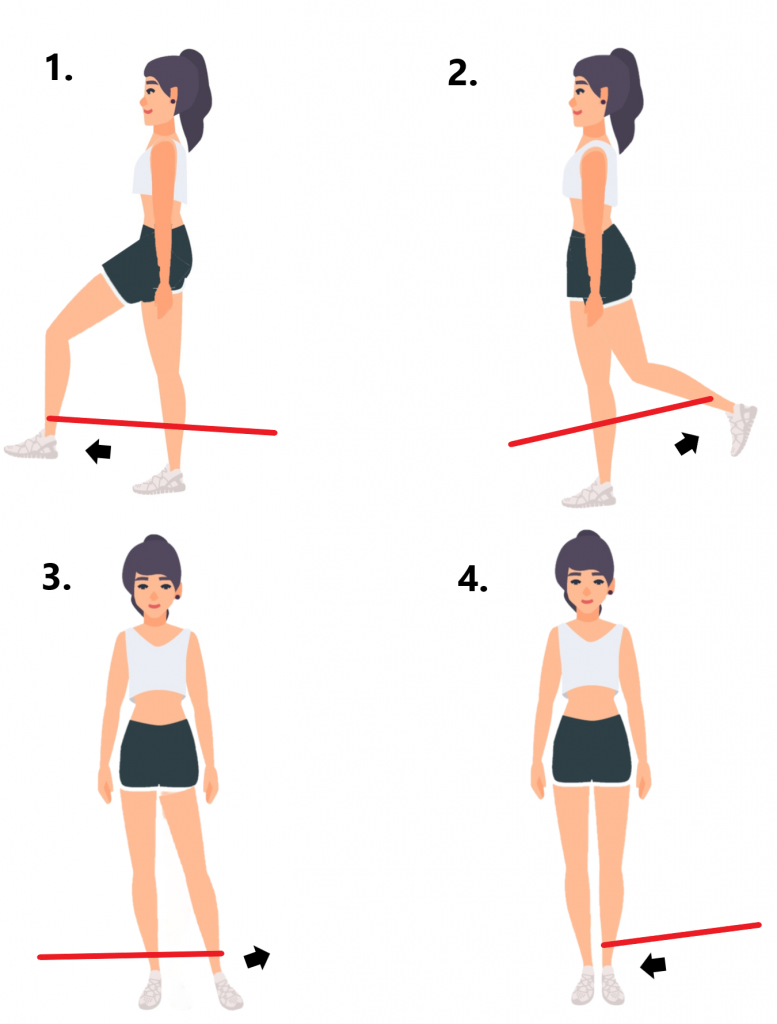
Progress Ankle Movement Exercises


– A stretch should be felt at the front of the ankle joint
Progress Strengthening Exercises

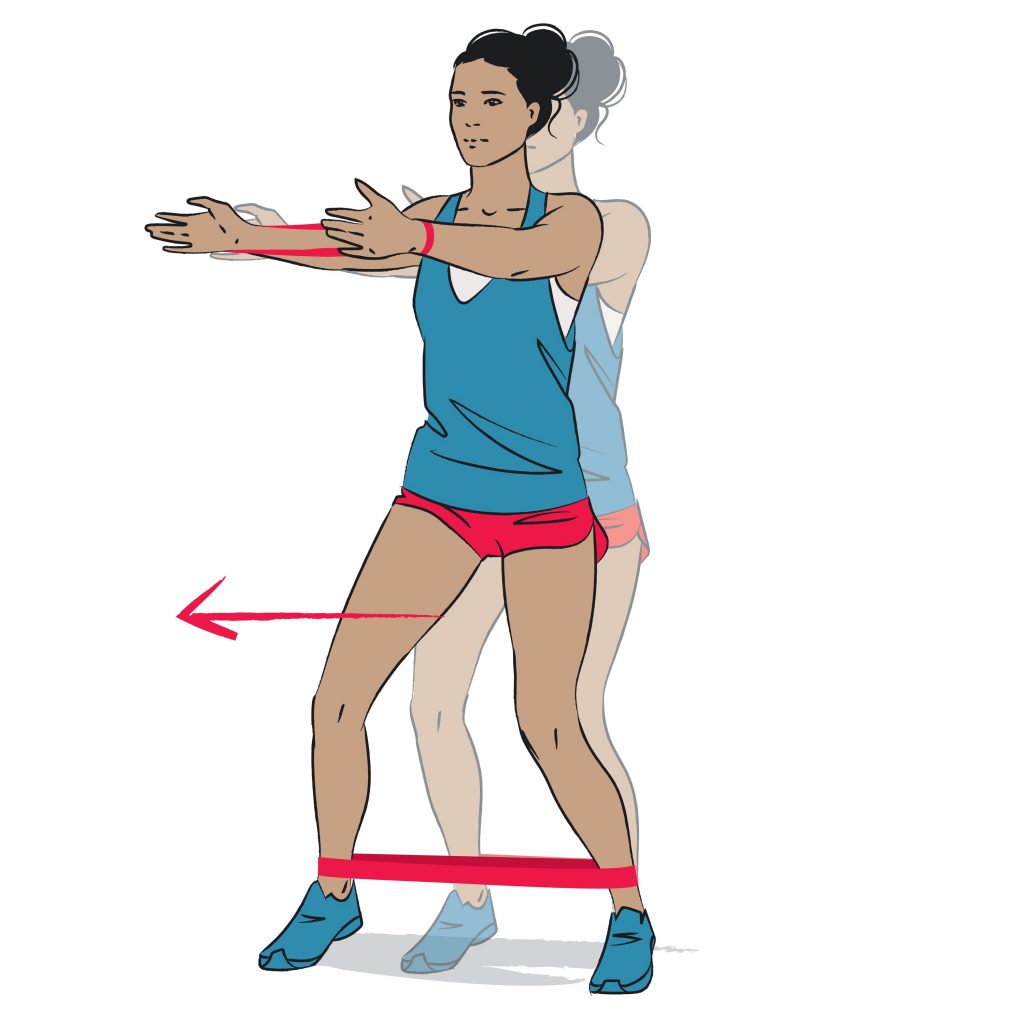
– Position band as above and stand on your tip toes
– Making sure to keep tension on the band, start shuffling sideways
– Crab walk 10m to L then R side
Progress Balance Exercises
-Connect the theraband to your GOOD leg and do several repetitions of each position above
– This exercise forces you to balance on your bad leg

i.e. bush walking, sand, slopes
Management of Ankle Sprains, Phase 4 (6 Weeks +)
This phase is more for those who participate in regular sporting activity. The higher demands of sport require a significantly greater level of strength, power and agility.
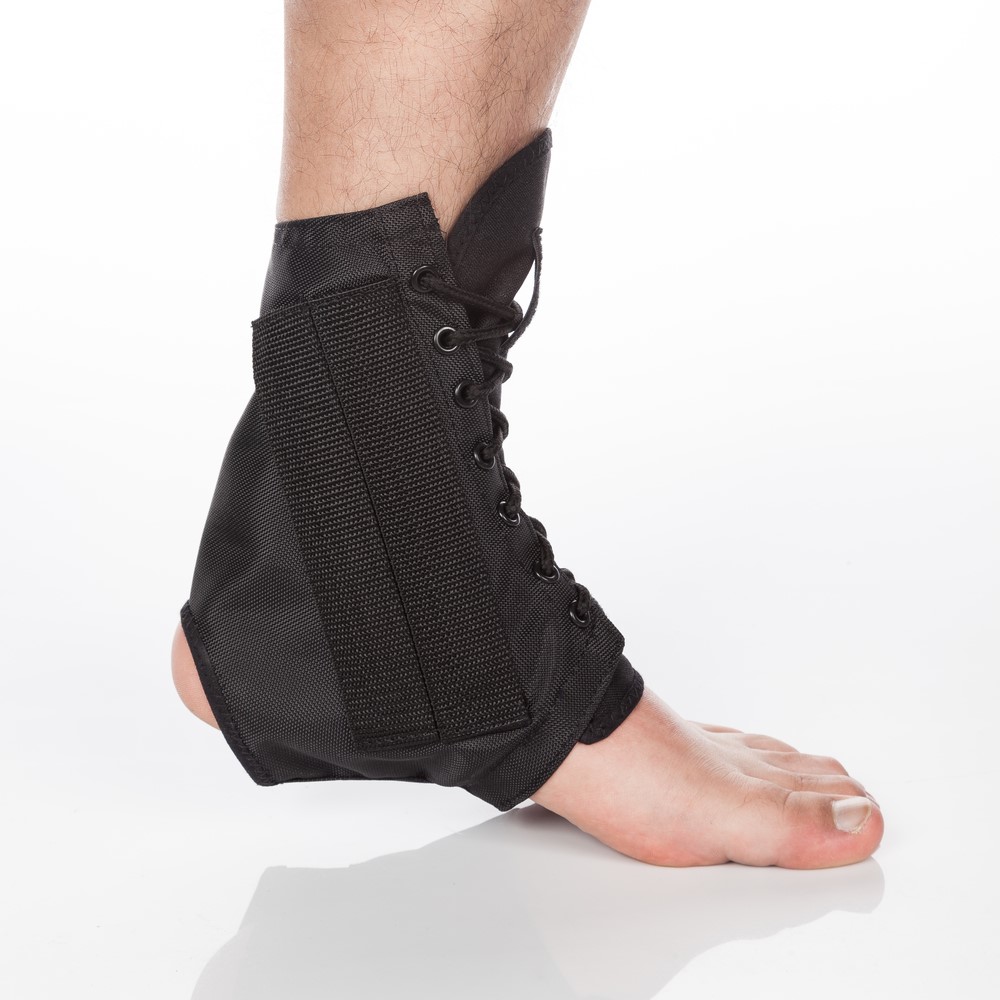
Bracing and Taping
Engaging in sporting activity places you at a higher risk of reinjury. Following an ankle sprain we suggest using protective taping or bracing to facilitate your return to sport. Ligaments have a poor blood supply and can take many months to heal, the last thing you want is to have to start from square one again!
Your individual circumstances will determine what type of ankle brace or taping would be best suited for your injury. Your treating health practitioner should be able to provide you with some guidance.
Hopping Exercises
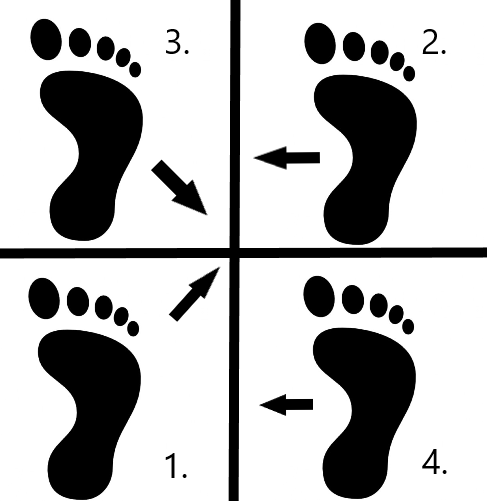

– Try to pause on each X

-Try to cover as much distance as you can hopping forwards 3 times
– Pause each time you land
Running Drills

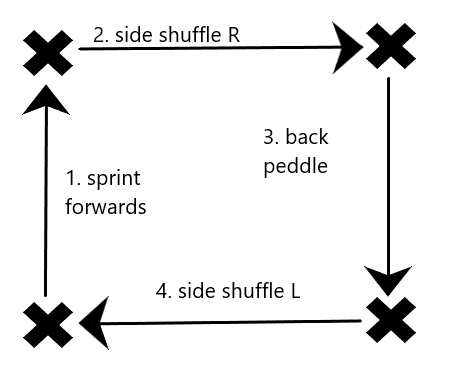
– Follow the pattern as above
– Once you hit the starting point, you can do the mirror image of the above pattern to work both sides equally

A Few Notes
- The time frames and exercises provided above may not be inline with your rate of recovery
- Break up your exercises, don’t try to do everything in one session
- It is normal for the swelling to take a few months to completely disappear.
- Exercising in a swimming pool can be good for people with advanced symptoms.
- If your symptoms significantly deteriorate performing any of the above exercises please cease and seek advice from a health professional.
Please keep in mind the information provided is general in nature and should not be used as a substitute to consult your treating health professional. If you have any specific questions or require assistance with your individual treatment requirements please do not hesitate to contact My Family Physio, Northern Beaches Sydney.
Related Articles